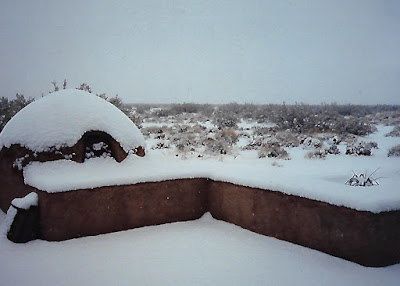
One of the first things I did after I built one of my houses was to pour a patio slab and build an outdoor oven. I enjoy doing the holiday cooking outside. I can cook a 20 pound prime rib and a big turkey in my outdoor oven without batting an eye. Near the end of the cooking I'll throw cast iron Dutch ovens in for my bread. The cooking process is simple.
 |
| How to Do Holiday Cooking Outdoors |
1. Build a fire to heat the oven and keep it burning for 4 to 5 hours.2. Shovel out the coals and ash and insert your items to cook and seal the oven up.3. When your meat thermometers show the meat is done to your liking pull it out.4. About 45 minutes before the meat is ready insert your Dutch ovens with your risen bread dough. Keep an eye on the bread so it doesn't burn, cover it with foil if needed.
Don't worry, after the first time you'll learn what works best for you. The high early heat wonderfully sears the meat and then the slow cooking process keeps everything moist. So, on to building one.
I had three pallets of 4"x10"x14" (thickness x width x length) adobe blocks delivered from a masonry supply. I also had them deliver re-bar and steel mesh for the patio slab as well as 2 yards of sand, 10 94# bags of Type II/V cement, and 3 60# bags of fire clay.
The slab was the usual business of forming it up, laying down the reinforcing steel and then calling the ready-mix people. Hiring a concrete subcontractor for that is probably your most efficient and cost effective solution. In my county slab work and an outdoor oven like this did not require a permit, but check with your local building inspector. A good relationship with the county planning people pays dividends over time. It's astounding what people will try to build without a permit, and how they will build it. Death trap springs to mind. One of the more memorable jobs I've seen was a propane hook-up using a garden hose and liberally applying RTV to seal it up.
Here's a Plan View of the oven. Most of the dimensions are left open so you can lay it out for your own comfort. Mirror rotating the drawing if you're left handed is a good idea. If you are in doubt roughly scale the layout from the drawing.
 |
| Plan View of My Outdoor Oven |
The following construction drawings were done by Architect Robert Montoya for New Mexico Magazine. They are reproduced here because they were intended for copying and open use so I don't think I'm stepping on anyone's copyright. By the way, all the photos and drawings used in this blog are done by me unless otherwise stipulated. So if they stink, blame me.
 |
| Construction Details. |
 |
| Adobe Block Details. |
 |
| Block Layout. |
.jpg)


No comments:
Post a Comment